How to add devices to your account
Before a device can access the internet, it must be linked to the Glide network. On most computers, tablets and mobile phones, this happens automatically when a sign-in page opens in the device’s web browser.
Devices without a web browser, such as game consoles, smart TVs, streaming devices and smart speakers, may need to be added to your Glide account manually using their MAC address.
A MAC address is a unique 12-character identifier assigned to a device’s network connection. It normally appears in a format such as AB:12:CD:34:EF:56.
Important:
- If your site uses the Glide Sign Up and Glide_Resident networks, you don't need to add the device manually, as its MAC address will link to your account automatically when you connect to Glide_Resident using your personal Wi-Fi password.
- Some devices, including wireless printers, Google streaming devices and Sonos speakers, rely on direct communication with other devices on the same network. This may not always be available on a shared managed Wi-Fi network. Please read our wireless device security article for more information.
Watch our guide
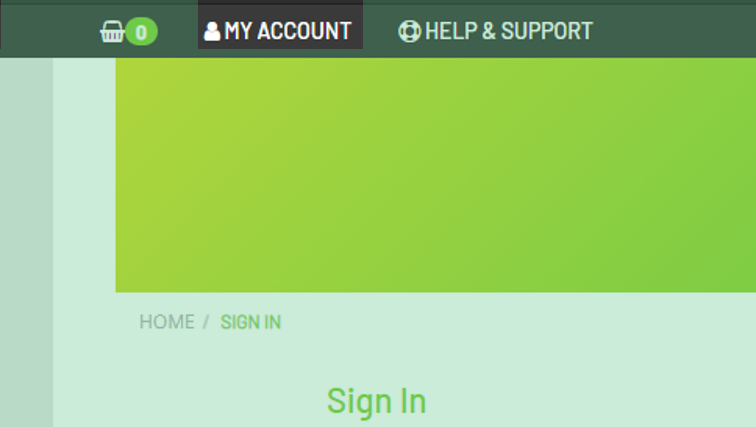
Add a device to your Glide account steps
2. Open Manage My Devices
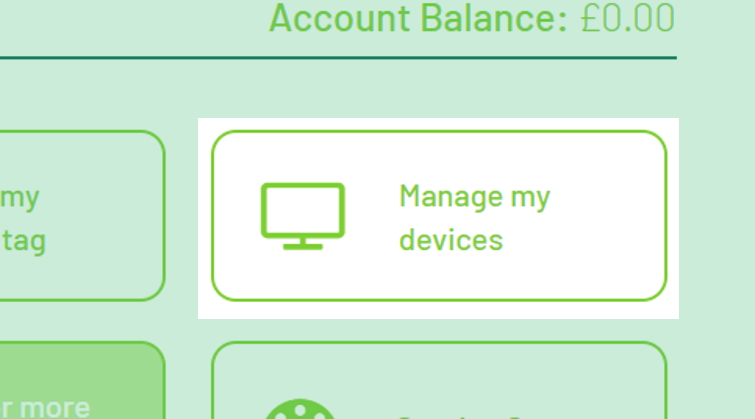
Select Manage My Devices from your account.
3. Add the device’s MAC address
Enter the MAC address for your games console, smart TV, streaming device or other equipment. You can enter it with or without the colons (:) or dashes (-).
If the device shows separate Wi-Fi and wired MAC addresses, add the address for the connection you intend to use. Do not enter a Bluetooth MAC address.
There is no limit to the number of devices that can be connected to your account.
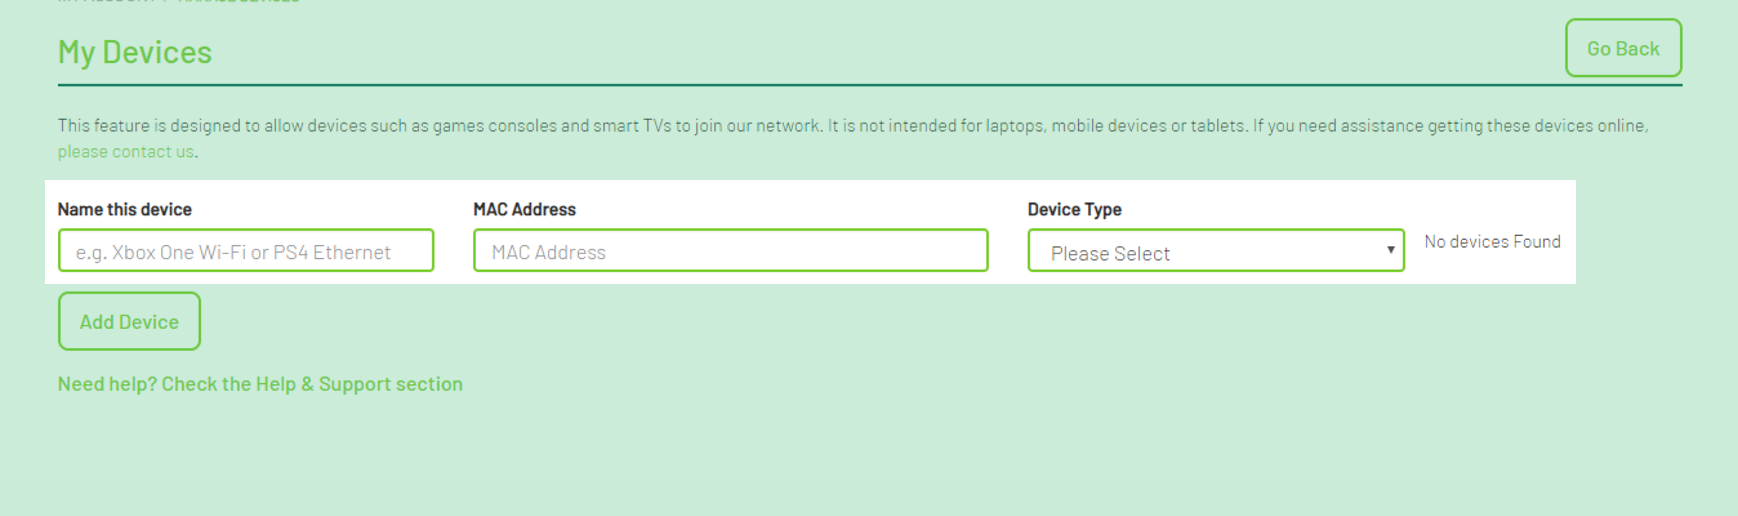
After adding the device: Restart it before trying to connect. It can take up to one hour for the device association to complete. If you receive an error such as “Not a valid MAC address”, contact the Service Desk using the form below and include the MAC address and your Glide account username or account ID in your message.
Find your device’s MAC address
▼ Select a device category, then select your device to view the instructions.
Games consoles
Xbox Series X|S and Xbox One
- Press the Xbox button to open the guide.
- Go to Profile & system > Settings > General > Network settings.
- Select Advanced settings.
- Use the Wireless MAC address when connecting by Wi-Fi, or the Wired MAC address when using an Ethernet cable.
If the console is being set up for the first time and you cannot reach these menus, temporarily connect it to a mobile hotspot to complete the initial setup.
Xbox 360
- Press the Guide button on the controller.
- Go to Settings > System Settings > Network Settings.
- Select the Wired Network or your wireless network.
- Select Configure Network > Additional Settings > Advanced Settings.
- The MAC address will be displayed on the screen.
PlayStation 5
- From the home screen, open Settings.
- Go to System > System Software > Console Information.
- Use the MAC Address (Wi-Fi) when connecting wirelessly, or the MAC Address (LAN Cable) when using Ethernet.
PlayStation 4
- From the home screen, open Settings.
- Go to System > System Information.
- Use the Wi-Fi or LAN cable MAC address that matches how the console will connect.
PlayStation 3
- From the home screen, go to Settings > System Settings.
- Select System Information.
- The console’s MAC address will be displayed on the screen.
Nintendo Switch 2, Switch, Switch OLED and Switch Lite
- From the HOME menu, select System Settings.
- Scroll down and select Internet.
- The System MAC Address will be displayed on the right-hand side of the screen.
If you use a separate USB Ethernet adapter or dock connection, the wired adapter may have a different MAC address printed on it.
Nintendo 3DS, 3DS XL and 2DS family
- From the HOME menu, select System Settings.
- Select Internet Settings > Other Information.
- Select Confirm MAC Address.
- The system’s MAC address will be displayed on the screen.
Streaming devices and smart TVs
Chromecast
During setup:
- Install and open the Google Home app on your phone or tablet.
- Follow the setup instructions until you reach the Connect to Wi-Fi screen.
- Select the three-dot More menu in the top-right corner.
- Select Show MAC Address.
After setup:
- Open the Google Home app.
- Select Home > All devices, then touch and hold the Chromecast tile.
- Select Settings > Device information.
- Find the MAC address under Technical information.
Chromecast with Google TV and Google TV Streamer
- Open Settings from the top-right corner of the TV screen.
- Go to System > About > Status.
- Find MAC address or Device MAC address.
Amazon Fire TV and Fire TV Stick
- From the Fire TV home screen, open Settings.
- Select My Fire TV or Device & Software.
- Select About > Network.
- The MAC address will be displayed on the screen.
Menu names may vary slightly depending on the Fire TV model and software version.
Roku player or Roku TV
- From the Roku home screen, open Settings.
- Select Network > About.
- Find the Wireless MAC address or Ethernet MAC address that matches your connection.
The MAC address may also be printed on the device or its packaging.
Apple TV
- From the Apple TV home screen, open Settings.
- Select General > About.
- Use the Wi-Fi Address when connecting wirelessly, or the Ethernet Address when using a network cable.
The address may also be printed on the label on the bottom of the Apple TV.
Samsung Smart TV
- Open Settings > All Settings.
- Select Support > About This TV.
- Scroll down to find the MAC address.
On some older Samsung TVs, select Support > Contact Samsung instead.
LG Smart TV
- Open Settings > All Settings.
- Open Support, then select TV Information.
- Find the MAC address in the device information.
Menu names vary by webOS version. On some models, the details are under General > Devices > TV Management > TV Information.
Other smart TVs and streaming devices
Open the device’s Settings and look under Network, About, System information or Device information. The MAC address may also be printed on a label on the device or its packaging.
Smart speakers and connected devices
Sonos speakers
- Open the Sonos app.
- Go to Settings > General Settings.
- Select About Your System.
- Find the speaker and check its serial number. The first six pairs of characters form the wireless MAC address.
In the Sonos S1 Controller app, go to Settings > System > About My System.
Google Nest and Google Home speakers
During setup:
- Open the Google Home app and begin adding the device.
- When you reach the Wi-Fi setup screen, select the three-dot More menu.
- Select Show MAC Address.
If the device is already set up:
- Open the Google Home app and select the device.
- Select Settings > Device information.
- Find the MAC address under Technical information.
Amazon Echo and Alexa devices
- Open the Alexa app.
- Select Devices, then select your Echo or Alexa device.
- Select the Settings icon.
- Open About or Device information and find the MAC address.
For a new device, the MAC address may also be printed on the device or its packaging.
Other smart devices
Check the device, its packaging or the manufacturer’s app for a label or menu named MAC address, Wi-Fi address, Network information or Device information. If the device is already connected to another network, its companion app will often display the MAC address in the device details.
Still cannot find it? Check the label on the device, its packaging or the manufacturer’s support website. Make sure you provide the MAC address for the connection you will use: Wi-Fi or Ethernet.